These instructions assume you have a running installation of OpenVPN Access Server. If you are inexperienced with OpenVPN, it is not recommended that you try this with a standard OpenVPN installation, as the setup is much more involved. We also assume that you have already registered in the MIRACL Trust Portal and have created a MIRACL Trust app to obtain API keys as detailed in the Installation.
Do not confuse Client Secret with Secret! Client Secret is the OIDC Client Secret of the MIRACL Trust API and Secret is the arbitrary secret that must be specified both in the MIRACL Trust RADIUS Server config.json and the OpenVPN admin UI so they can authenticate to each other.
# MIRACL Trust RADIUS Setup
For new settings to take effect, the service needs to be restarted.
Make sure your /etc/miracl-radius/config.yaml lists the correct files to
include (you need to add hosts/openvpn.yaml file to it):
includes:
  - core.yaml
  - hosts/openvpn.yaml
Open your /etc/miracl-radius/core.yaml file and edit the mfa section to
include the Client ID and Client Secret from your app (as created in the MIRACL
Trust Administration Portal in the Installation section):
server:
  address: :1812
  otp_address: :8000
protocols:
  - pap
  - chap
  - mschapv1
mfa:
  global:
    client_id: <YOUR_CLIENT_ID>
    client_secret: <YOUR_CLIENT_SECRET>
Then edit your /etc/miracl-radius/hosts/openvpn.yaml file. Add the IP of your
OpenVPN Access Server and the shared secret (a strong and hard to guess
arbitrary string) that should also be entered in the OpenVPN Access Server admin
console. For the purposes of this simple demo you can also use the mfa_id
parameter to allow for a non-email username. The example below means that you
can use the first half of an ‘@mycompany.com’ email address as your username for
logging into OpenVPN (e.g. ‘john’ from ‘john@mycompany.com’):
host:
  34.251.7.176:
    name: openvpn
    mfa: global
    secret: '<SECRET>'
    mfa_id: '{{.UserID}}@mycompany.com'
    authorize: true
#    authorize:
#    - - ldap: ldap_profile
Using authorize: true on its own means that everyone is permitted to attempt to login. If you combine it with mfa_id:’{{.UserID}}@mycompany.com’ only users with the @mycompany email domain are authorized. The LDAP and authorization section explains how LDAP or simple regex of email domains can be used for more detailed control of lists of users authorized to attempt to login.
# Note on User Authentication
To generate OTP users need to register first. Registration is outlined in the OTP Generation page. Authentication to OpenVPN client could be done using a user identifier and not an email. This is achieved using the mfa_id configuration option of the MIRACL Trust RADIUS Server which transforms the email to user identifier.
# OpenVPN Configuration
Note that port 1194 (UDP) needs to be open, as does 943 (TCP), to allow use of the web UI. 443 (TCP) also should be open.
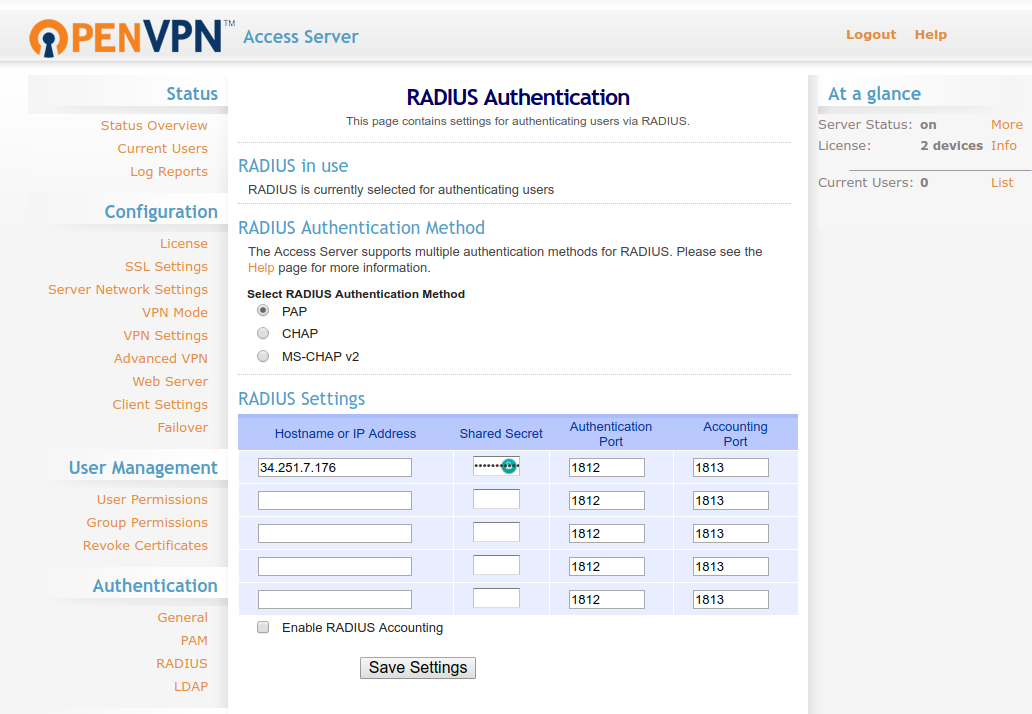
In the OpenVPN Access Server admin console, go to Authentication > RADIUS and turn RADIUS on as the auth method (NOTE – make sure that the protocol you have chosen (PAP or CHAP) is enabled in your /etc/miracl-radius/core.json file for MIRACL Trust RADIUS). Add your MIRACL Trust RADIUS server IP Address and enter the shared secret. Save the settings and update the running server:
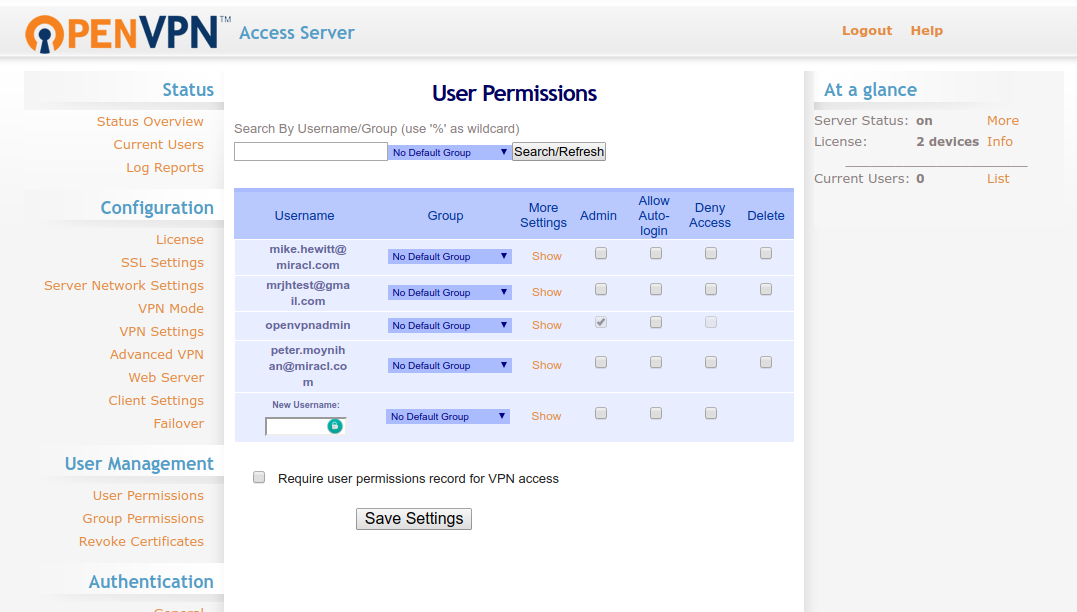
Go to User Management > User Permissions and add a new user with your email as username (matching the email you registered with the RADIUS app in the portal described in OTP Generation. Note that no password is required, as we are using RADIUS). If you use the mfa_id parameter, you can also use just the prefix from your email address as a username. Please see earlier note on user authentication for an explanation of this. Save and update the running server:
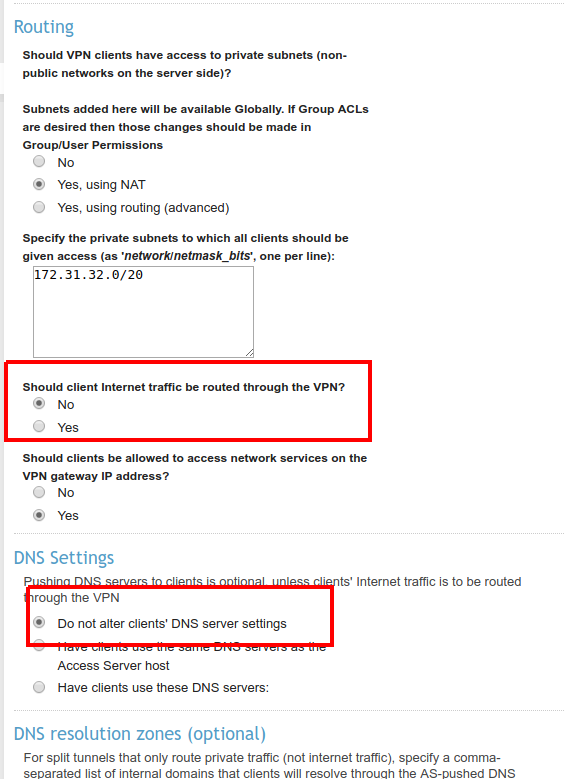
In order to prevent overwriting of your DNS when running the test client, you should also make sure the following settings are made:
Go to the non-admin login https://<OPENVPN_IP>:943 URL of OpenVPN:
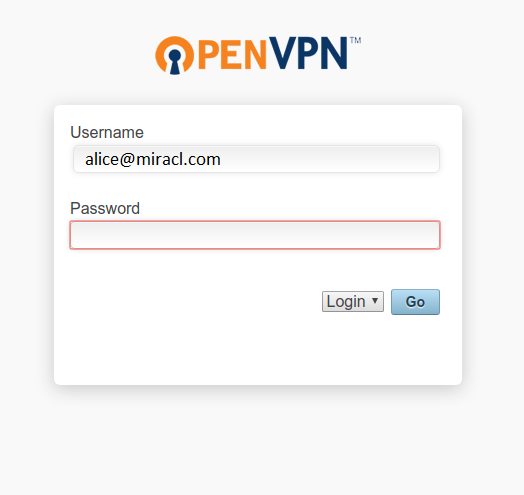
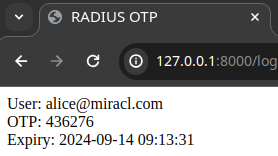
Log in with your registered email in the OTP address to generate an OTP:
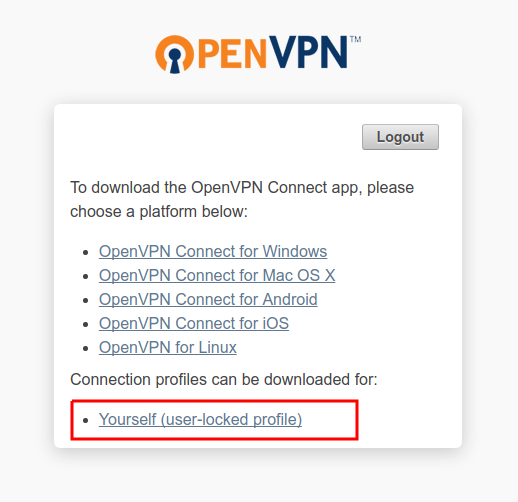
Once logged in, download the openvpn config file:
# Test Login
Now run the openvpn config file:
sudo openvpn --config client.ovpn
You can generate an OTP by visiting the OTP address URL for in-browser OTP generation to generate an OTP (see here for an explanation of in-browser OTP generation).
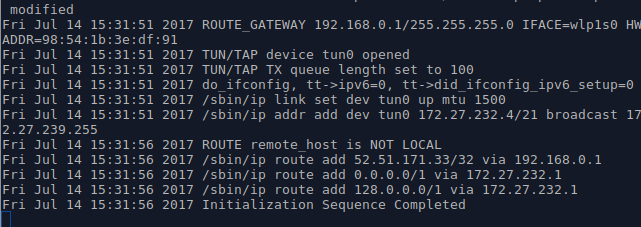
You should now see that the connection has been made:
And the connection is visible in the Status > Log Reports section of the OpenVPN admin UI:
